Follow Us


© Copyright 2026 ArcTouch. All rights reserved.
© Copyright 2026 ArcTouch. All rights reserved.
Android market fragmentation is a popular topic. But designing for the variety of Android Screens isn't as hard as you might think. We offer 9 tips to help.
5 min. read - September 25, 2014
Get our newsletter in your inbox.
ArcTouch shares 7 accessibility user testing insights and best practices for apps and websites.
ArcTouch’s design team shares insights on using generative AI to help create mood boards for UI inspiration.
We help companies of all sizes build lovable apps, websites, and connected experiences.
Fragmentation of the Android device market is a popular topic. During Apple’s June WorldWide Developers Conference, Apple CEO Tim Cook went so far as to call Android “a toxic hellstew of vulnerabilities.”
Cook’s message added more fuel to the popular belief that the open Android market of devices is the equivalent of the wild wild west. And that developing reliable, secure, and engaging apps for all those devices is much more difficult, time consuming and expensive than iOS.
Certainly it’s a challenge to develop for Android. But the magnitude of that challenge is largely overblown (thanks to rhetoric like “toxic hellstew”).
Today, I’ll offer up nine tips on how to design for the different sizes of all Android screens — probably the most talked about variation in the Android ecosystem. The Android SDK includes a robust set of tools to help. And there are a number of techniques and best practices that we at ArcTouch follow to ensure our designs provide a great user experience — regardless of the screen size.
When designing and developing apps for Android screens, the key is positioning things in relative terms and not using absolute references. We typically use the RelativeLayout view group container for the apps that we develop. Don’t use the AbsoluteLayout view group — it was deprecated after API Level 3, also known as the Cupcake SDK, which dates back to 2009. You won’t find many people with an Android device that old.
One of the biggest mistakes you can make as a designer for Android is to specify hard-coded image sizes. To avoid this, we invariably use “wrap_content” and “match_parent” as the dimensions for width and height, rather than specifying hard-coded sizes. As defined by Google:
wrap_content tells your view to size itself to the dimensions required by its content.
match_parent (named fill_parent before API Level 8) tells your view to become as big as its parent view group will allow.
When we do specify actual values, we don’t use pixels but instead define values in DPs (density independent pixels). This is a form of measurement that the Android SDK provides for defining layout dimension. It’s one of the many techniques to ensure optimal results when Android scales and re-sizes screens to fit a target device. It allows developers to deal in terms of generalized sizes (small, normal, large, and xlarge) and generalized densities (low, medium, high, extra-high, etc.) rather than specific resolutions and sizes.
A normal-sized, medium-density device is considered the baseline, and views and drawable resources are scaled at run time based on the density of the device screen.
Because scaling bitmaps sometimes leads to poor results, Android allows you to specify alternative bitmaps to be used for different densities. In fact, this flexibility isn’t limited to just the density; it can be used for all the types of resources.
Making use of this is as simple as creating suitably-named resource folders, in the form of res/<resources_name>-<config_qualifier>, and placing the appropriate resources inside each folder. At run time, the appropriate resources are loaded, based on the device’s configuration.
You can use multiple qualifiers, as long as there’s a pre-defined order.
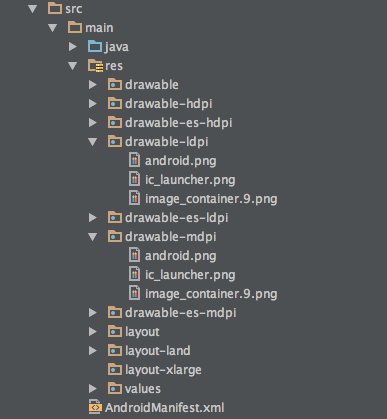
In the image below, you can see that alternate drawables have been defined simply by placing each one in their respective folder: drawables to be used on low-density devices (drawable-ldpi), those for medium-density devices (drawable-mdpi), and so on. This particular project also has drawables that specific to the Spanish locale (drawable-es). No specific tagging or configurations are needed — the location within the folder structure assigns the devices to the applicable resource.
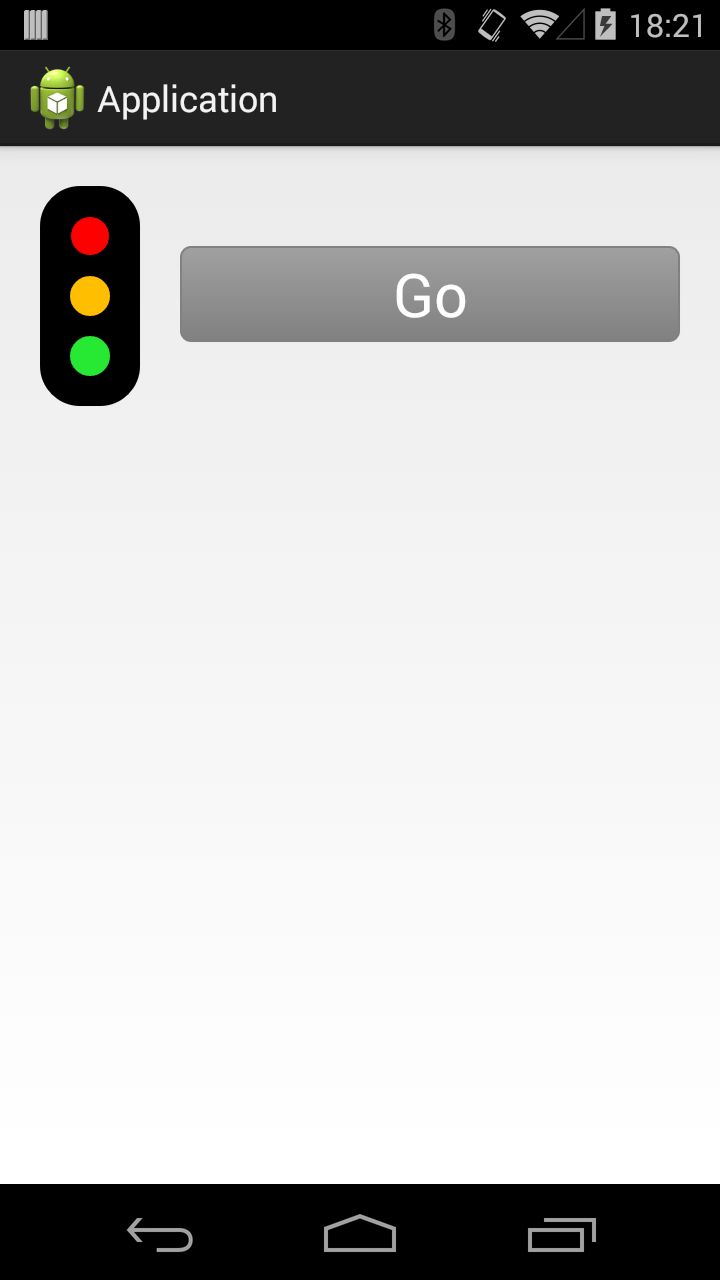
Instead of creating custom shapes for your app, use XML to define shape drawables, as specified by Google here. As well as reducing the number of bitmaps that need to be maintained at different resolutions, this approach offers significantly lower overhead than using custom assets — minimizing the file size of the final APK. With these drawables, you can create button backgrounds, lines and even entire views made up of simple geometric shapes. For example, the button and stoplight below is comprised entirely of these XML based drawables.
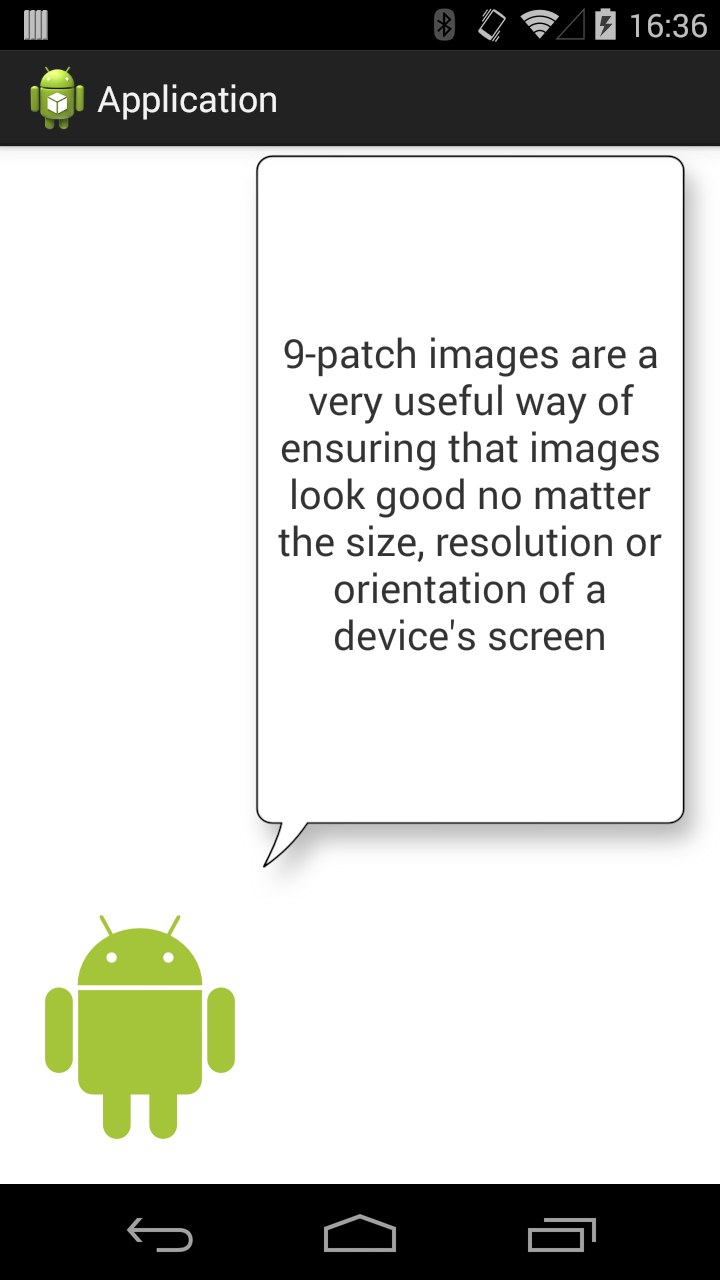
Another way Android helps developers is with 9-patch images. These are standard images — typically a background image like a button or a speech bubble — with a hidden set of pixels that defines which parts of the image can be stretched and which parts should be fixed. So, no matter the size or orientation of a screen — or the length of a text block inside the image — the image adjusts to the correct proportions (as shown below).

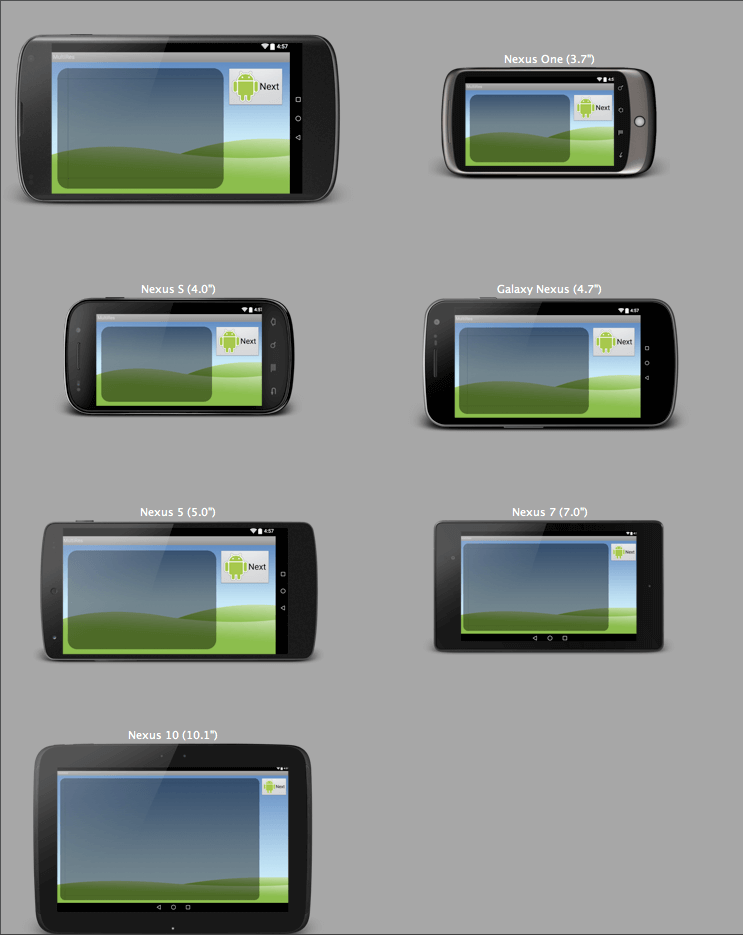
Whether constructing layouts in the Text view or the Design view, Android’s Layout Editor provides a very useful, real-time preview of how an image will appear on different screen sizes. The range of devices is configurable, as well as the ways that each view is displayed.
Shown below, this preview saves a lot of time and hassle in not having to redeploy an app to multiple devices, while building and tweaking screen layouts.
The flexibility of the resource folder naming extends to the API level. This provides a useful means of handling support for older devices.
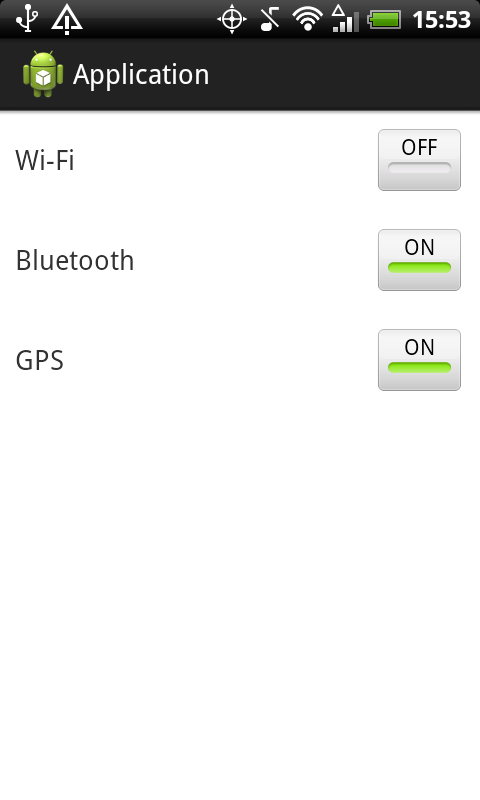
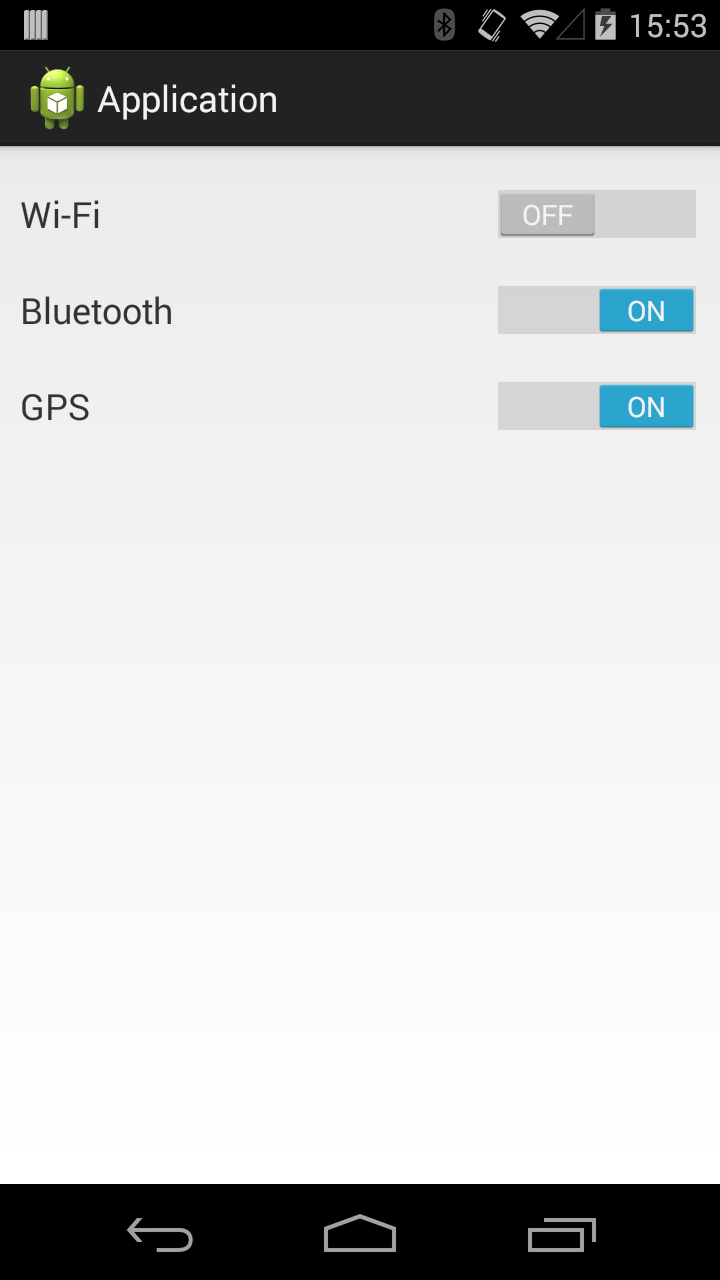
For example, a design for a settings screen may call for options that can be turned on or off. On newer devices, this is done with a switch, added to the Android SDK in the Ice Cream Sandwich release. To support older (pre-Ice Cream Sandwich) devices, a toggle button could be used as an alternative.
To implement, include a layout that references a toggle button and is located in the “res/layout” folder, like this:

Then, inside of a “res/layout-v14” folder, define an identically named, alternative layout that references a Switch widget:

Android will automatically ensure devices with Android 4.0 or later show the layout containing the switch; older devices will show the toggle button layout.
Because these differences are kept within the resource structure, and because a toggle button and a switch both extend from the same “CompoundButton” class, there’s no need for any special handling in the code. It all just works!
Developing for tablets provides an additional challenge (as it does for iOS) because Android screens that look great on a phone won’t look right when they are scaled up to the size of a tablet. This is most obvious when white space or padding between buttons become magnified.
Android provides specific support to assist with this. You can use a resource folder to define a tablet-specific layout. And, with Android 3.0 (API level 11), Google introduced Fragments. Fragments are modular pieces of a user interface that can be used in different combinations. For example, on a phone you might have one fragment that takes up the entire screen. But on a tablet, you might have a two separate fragments that are functionally exclusive from one another.
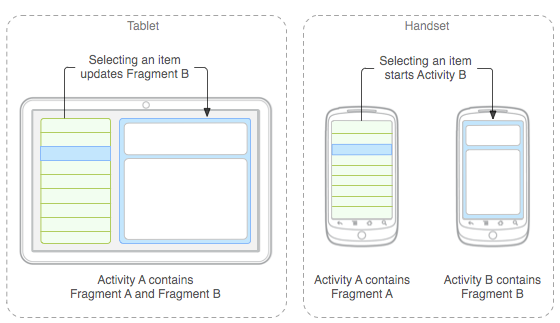
Source: developer.android.com
Although Fragments were introduced in the Honeycomb release, Google later added a support library so this new framework can be used for apps on pre-Honeycomb devices.
This support library is constantly updated, allowing developers to make use of the newest features of the OS while ensuring that apps remain compatible with older devices.
There’s no doubt that fragmentation of the Android OS presents a development challenge. In particular, testing has to be done on a wide range of devices, and it can be difficult to reproduce device-specific bugs — especially on older hardware that you may not have in your arsenal of test devices. However, the wide range of device sizes and screen resolutions is a manageable challenge. Android’s SDK provides great tools to handle this — and an experienced app designer and developer will know how to use them.
